
How to Carve a Turkey: Take It Apart First, Then Slice
Shaving slices off the side of the bird at the table gives you stringy meat and a carcass still covered in turkey. Taking it apart in the kitchen first is faster, and every slice comes out tender.
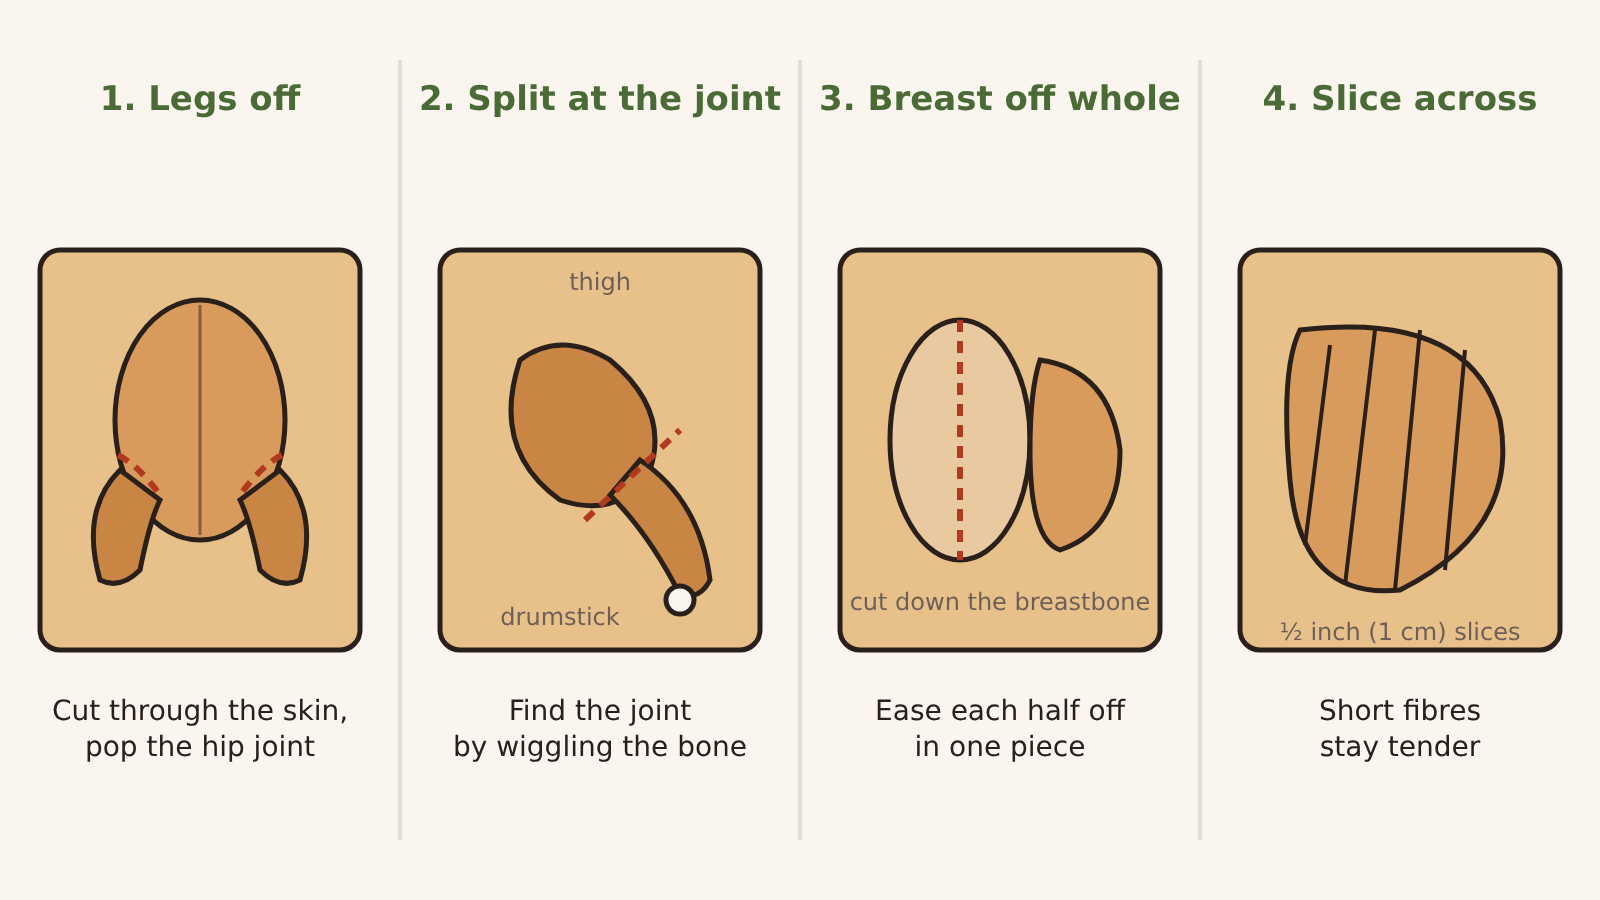
To carve a turkey, take it apart before you slice it: remove each leg at the hip joint, split it into drumstick and thigh, lift each breast half off the bone in one piece, then slice the breast across the grain. Done this way, every slice is tender, every piece has skin, and the job takes about 10 minutes with an ordinary sharp knife.
Carving at the table, shaving thin slices off the side of the bird, looks festive but gives you long, stringy slices and leaves a lot of meat on the frame. Working on a board in the kitchen is faster and wastes less.
What you need
- A sharp chef's knife or carving knife, 8 to 10 inches (20 to 25 cm). Sharpness matters more than the knife's name: a dull blade tears the skin and squashes the meat.
- A large cutting board, ideally with a groove to catch juices. Put a damp towel under it so it does not slide.
- A carving fork or a pair of tongs to steady the bird, and a warm platter.
Rest first
Let the roast turkey stand for 20 minutes, loosely covered with foil, after it reaches 165°F (74°C) in the breast, thigh and wing. Resting lets the juices settle so they stay in the meat instead of flooding the board, and the bird cools just enough to handle. A big turkey stays hot for longer than you would expect; 30 minutes is fine too. If you need the timings and thermometer spots, they are in our guide on how to roast a turkey.
Use the resting time to finish the gravy.
Step 1: Take the legs off
Set the turkey breast side up with the legs toward you. Cut through the skin between the breast and one thigh. Pull the leg outward and down, away from the body, until the hip joint pops out of its socket. Cut through the joint and the skin behind it to free the whole leg. Repeat on the other side.
As you pull the leg away, turn the bird slightly and look for the oyster, a small, round piece of dark meat that sits in a hollow on the back just above the thigh. Scoop it out with the tip of the knife so it comes away with the thigh.
Step 2: Split the drumstick and thigh
Lay the leg skin side down. Wiggle the drumstick: you will feel where it bends against the thigh. That is the joint. Cut straight through it; if the knife meets bone, move a few millimetres and try again rather than forcing it.
Serve the drumsticks whole. For the thighs, cut along the bone to free the meat, then slice it into pieces about ½ inch (1 cm) thick.
Step 3: Take each breast half off in one piece
Find the breastbone, the ridge running down the middle of the top. Cut down along one side of it, keeping the blade close to the bone. Then, with short strokes, follow the curve of the ribcage down and outward, pulling the meat gently away from the bone with your other hand or the fork as you go. Cut through at the wishbone end and along the bottom, and the whole breast half comes off as one large piece with its skin on. Repeat on the other side.
This is the step that changes the result most. With the breast off the bone you can see which way the fibres run, which you cannot do while it is still on the bird.
Step 4: Slice across the grain
Set the breast skin side up. Look for the lines of the muscle fibres; on a turkey breast they run roughly from the wing end to the tip. Cut across them, not along them, in slices about ½ inch (1 cm) thick. Each slice is then made of short fibres, so it is tender in the mouth instead of chewy.
Keep the skin on each slice. A sharp knife and a single long stroke per slice, rather than sawing, keeps the skin attached.
Step 5: The wings
Pull each wing away from the body, find the shoulder joint as you did with the legs, and cut through it. Serve whole, or split at the middle joint.
Arranging the platter
Lay the breast slices in an overlapping row, with the dark meat at one end and the drumsticks and wings at the other, so guests can choose. Spoon a little hot stock or pan juice over the sliced breast to keep it moist if it has to wait. A warm platter helps; turkey cools fast once sliced.
Save the carcass
Pull off any meat still clinging to the frame; there is usually more than you would guess, especially underneath. Then put the bones in a pot for stock, or wrap and refrigerate them to make stock the next day.
Within 2 hours of the turkey coming out of the oven, get the meat into the fridge in shallow containers. Cooked turkey keeps 3 to 4 days in the fridge, and the stock is the start of a good soup.
Troubleshooting
- The joint will not give. You are probably cutting into bone. Bend the joint again to find the gap, and come at it from a slightly different angle.
- The meat is pink near the bone. If every thermometer reading reached 165°F (74°C), it is safe: young turkeys can stay pink near the bone even when fully cooked. If you did not check, check now.
- Slices are shredding. The knife is dull or you are sawing. Hone it, and make each slice one long draw from heel to tip.
- The breast is dry. Slice only what you are about to serve, spoon warm turkey gravy over it, and next time tent the breast with foil earlier, or take the legs off and finish them separately while the breast rests.
