
Cut-Out Sugar Cookies That Hold Their Shape
Puffy, blurry stars come from three things: leavening, too much air beaten into the butter, and warm dough. Leave those out and a cut-out cookie keeps its points. Here is the recipe, with icing and make-ahead notes.
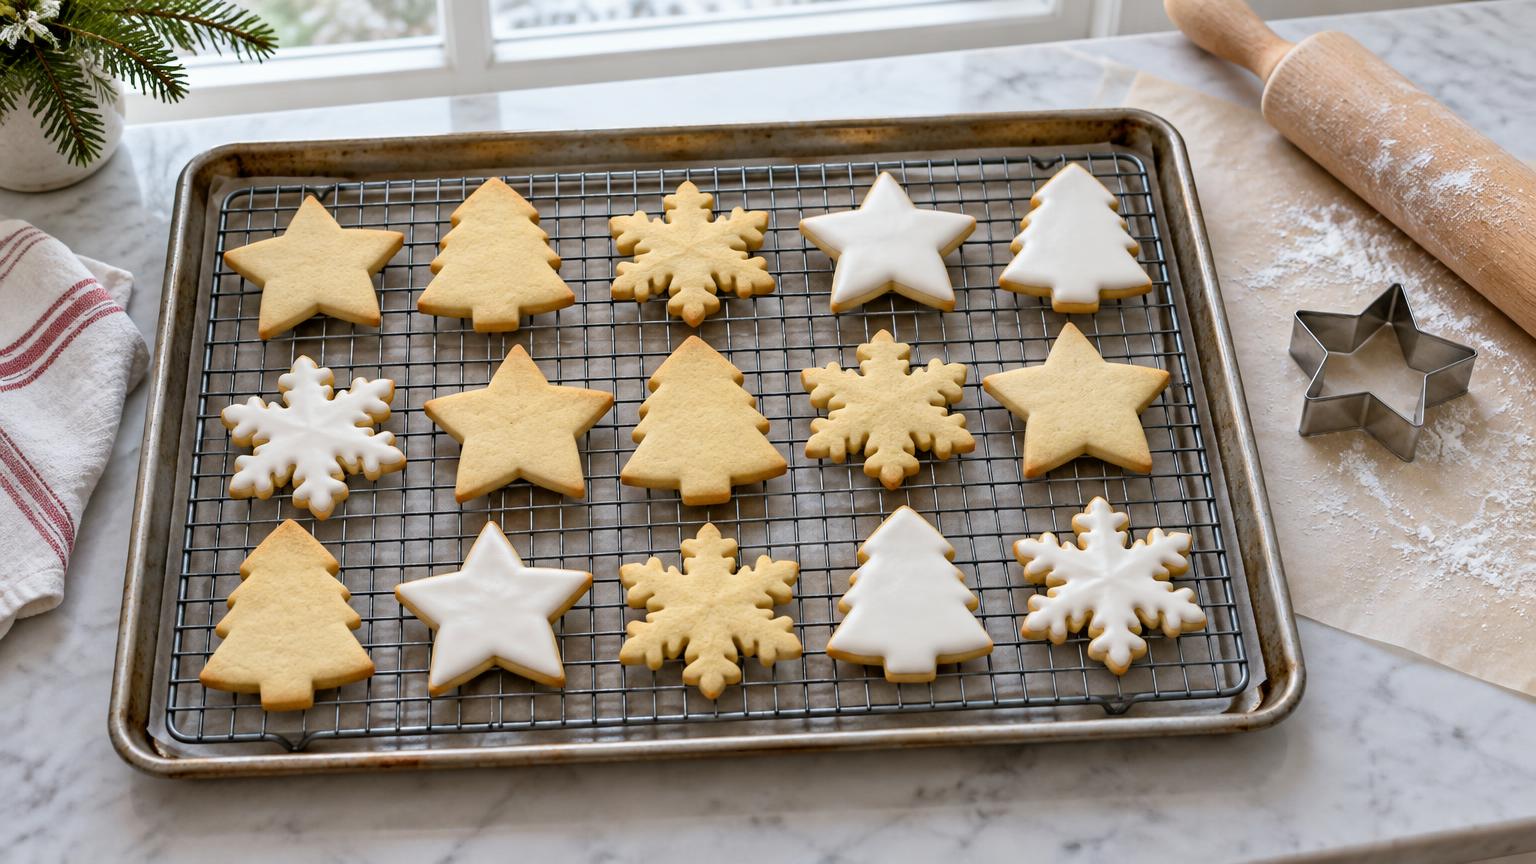
Sugar cookies hold their shape when the dough has no baking powder or soda, the butter is mixed just until smooth instead of beaten fluffy, and the cut shapes go back in the fridge for 15 minutes before baking. Those three changes stop the dough from rising and spreading in the oven, so a star with five sharp points comes out with five sharp points.
Makes: about 30 cookies, 3 inches (8 cm) across Prep time: 30 minutes, plus 1 hour chilling Cook time: 9 to 12 minutes per tray Oven: 350°F (175°C) Contains: gluten (flour), dairy (butter), eggs. Nut-free as written. Swaps below.
Why cut-out cookies spread
Three separate things blur the edges, which is why fixing only one of them often disappoints.
Leavening. Baking powder and baking soda make gas in the oven, and the gas pushes the dough up and out. That is welcome in a chewy chocolate chip cookie. In a cut-out it rounds every corner. If you want to know how the two work, see baking soda vs baking powder. This recipe uses neither.
Air in the butter. Beating butter and sugar for several minutes fills the mixture with tiny bubbles, which expand with heat. Mix only until the two are combined and the dough stays dense.
Warm fat. Butter melts at a fairly low temperature. If the dough goes into the oven soft, the butter melts before the flour and egg have set, and the cookie slumps. Cold dough sets first.
Ingredients
For the cookies:
- 1 cup (226 g) unsalted butter, cool but dentable, cut into pieces
- 1 cup (200 g) granulated sugar
- ½ teaspoon (3 g) fine salt
- 1 large egg
- 2 teaspoons (10 ml) vanilla extract
- 3 cups (375 g) all-purpose flour, spooned and leveled, plus a little for rolling
For the icing:
- 2 cups (240 g) powdered sugar
- 2 to 3 tablespoons (30 to 45 ml) milk
- ½ teaspoon (2.5 ml) vanilla extract
Steps
- Mix the butter, sugar and salt on medium-low speed for about 1 minute, just until smooth. Stop before it turns pale and fluffy.
- Add the egg and vanilla, and mix until combined.
- Add the flour in two additions on low speed. Stop as soon as no dry flour shows. The dough will look a little crumbly, and more mixing only toughens it.
- Divide the dough in two. Press each piece into a flat disc about 1 inch (2.5 cm) thick, wrap and chill for 1 hour. Flat discs chill faster and roll with fewer cracks.
- Heat the oven to 350°F (175°C) and line baking sheets with parchment. Grease spreads the dough, so skip it.
- Roll one disc between two sheets of parchment to ¼ inch (6 mm). An even thickness matters more than the exact number, because thin spots brown before thick ones finish.
- Cut shapes close together and move them to the sheet with a thin spatula, 1 inch (2.5 cm) apart. Reroll scraps once or twice, chilling them if they turn soft.
- Chill the tray for 15 minutes, or 5 minutes in the freezer. This is the step people skip, and it matters most.
- Bake one tray at a time for 9 to 12 minutes, until the edges are just golden and the tops look dry. Smaller shapes take less time, so bake similar sizes together.
- Leave on the tray for 5 minutes, then move to a rack. They firm up as they cool.
- For the icing, stir the powdered sugar, 2 tablespoons (30 ml) of milk and the vanilla until smooth. Add milk a few drops at a time until it falls off the spoon in a slow ribbon. Spread or pipe onto cooled cookies and let it set for a few hours before stacking.
Do not taste the raw dough. Raw flour and raw eggs can both carry germs, even in a small nibble.
If your cookies still spread
- Soft dough on the tray: your kitchen may be warm, or the oven busy with dinner. Chill longer.
- Too little flour: weigh it if you can. Scooping and measuring by volume can vary by a lot.
- Hot baking sheets: let trays cool between batches, because warm metal starts melting the butter before the oven does.
- Hot spots: an oven running hot can over-brown the edges before the middle sets. An inexpensive oven thermometer will tell you.
Allergen swaps
- Gluten: use a 1-to-1 gluten-free baking blend with xanthan gum. The dough is more fragile, so keep it cold and cut simple shapes.
- Dairy: use a dairy-free baking stick, not a soft tub spread, which has too much water. Use a plant milk in the icing.
- Eggs: replace the egg with 3 tablespoons (45 ml) of a commercial egg replacer mixed as the box directs. The cookies turn out a bit more delicate.
- Nuts: none in this recipe. Check the labels on sprinkles and decorations if you are baking for someone with an allergy.
Storage and make-ahead
Keep iced cookies in a single layer, or between sheets of parchment, in an airtight tin at room temperature for up to 1 week. Plain baked cookies freeze well for 3 months. Ice them after thawing.
Wrapped dough keeps for 3 days in the fridge or 3 months in the freezer. You can also freeze the cut shapes on a tray, bag them and bake from frozen, adding a minute or two. That makes December much easier, in the same way the Thanksgiving cooking timeline spreads the work over several days.
