
How to Use a Meat Thermometer: Where the Probe Goes and How to Test It
Push the tip into the centre of the thickest part, away from bone, and trust the number over the clock. Where the probe goes, the USDA temperatures to look for, and a two-minute ice-water test for accuracy.
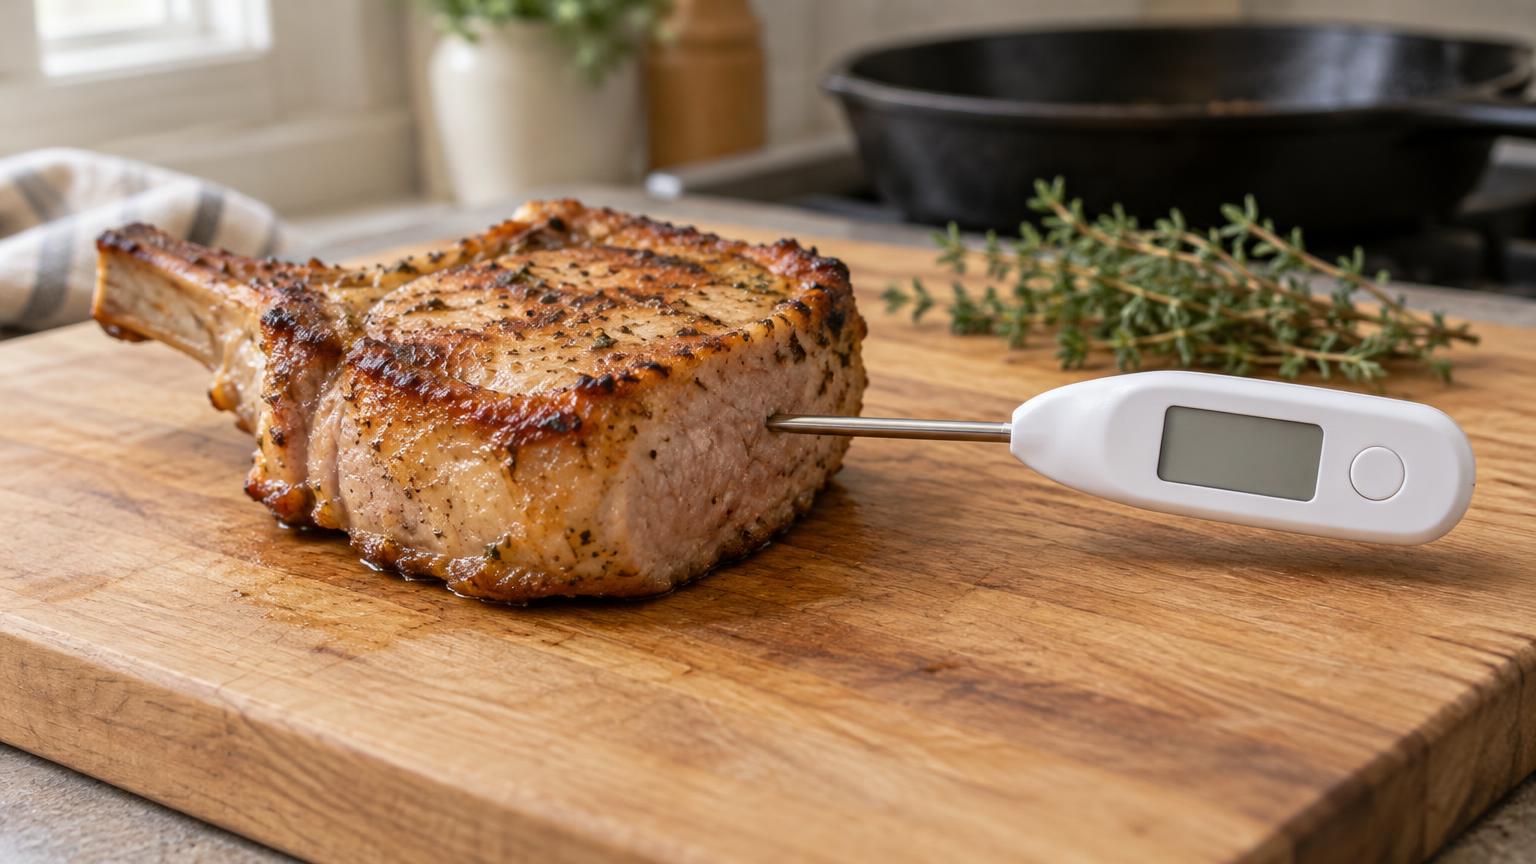
Push the tip of the thermometer into the centre of the thickest part of the food, away from bone, fat and gristle, and wait until the number stops climbing. For a thin chop, burger or chicken breast, go in from the side so the whole tip sits in the middle. That single reading tells you more than cooking time, colour or juices ever will, as long as the thermometer itself reads true. You can check that in two minutes with a glass of ice water.
Here is how to place it, which number to look for, and how to test the thermometer before a big roast.
Why a thermometer beats the clock
Recipe times assume a certain thickness, a certain starting temperature and an oven that runs true. Change any of those and the time is off. A chop straight from the fridge cooks slower than one that sat out while you made the sauce; a turkey that is still a little icy inside can need far longer than the chart says.
Colour is no more reliable. USDA points out that meat can look done before it reaches a safe temperature, and some cuts stay pink after they are safely cooked. Clear juices from a chicken thigh don't prove anything either. The thermometer is the only check that measures what you care about: how hot the slowest part of the food has become.
Which thermometer does what
Digital instant-read. A thin probe with a display on the handle. It gives a reading in a few seconds, and the sensor sits near the tip, so it works in thin food. It is not made to stay in a hot oven: take readings, then pull it out. This is the one to own if you buy only one.
Dial instant-read. The older pocket type with a needle. The sensing part runs along the bottom of the stem, roughly the last 2 to 2½ inches (5 to 6 cm), so it needs food at least that thick to read well. It is slower than digital and also comes out of the oven between checks.
Oven-safe dial. A sturdier dial thermometer that stays in a roast for the whole cook. Handy for a large turkey or prime rib, but read it through the oven window rather than relying on it for thin cuts.
Leave-in probe with a cable or wireless display. The probe stays in the meat, the display sits outside the oven, and many can sound an alarm at a set temperature. Useful for long roasts and smoking, where opening the door costs heat.
Pop-up timers. The plastic button that comes in some turkeys. USDA advises checking with a real thermometer as well, in the thigh, wing and breast, because the button only tells you about the one spot it sits in.
Where to put the probe
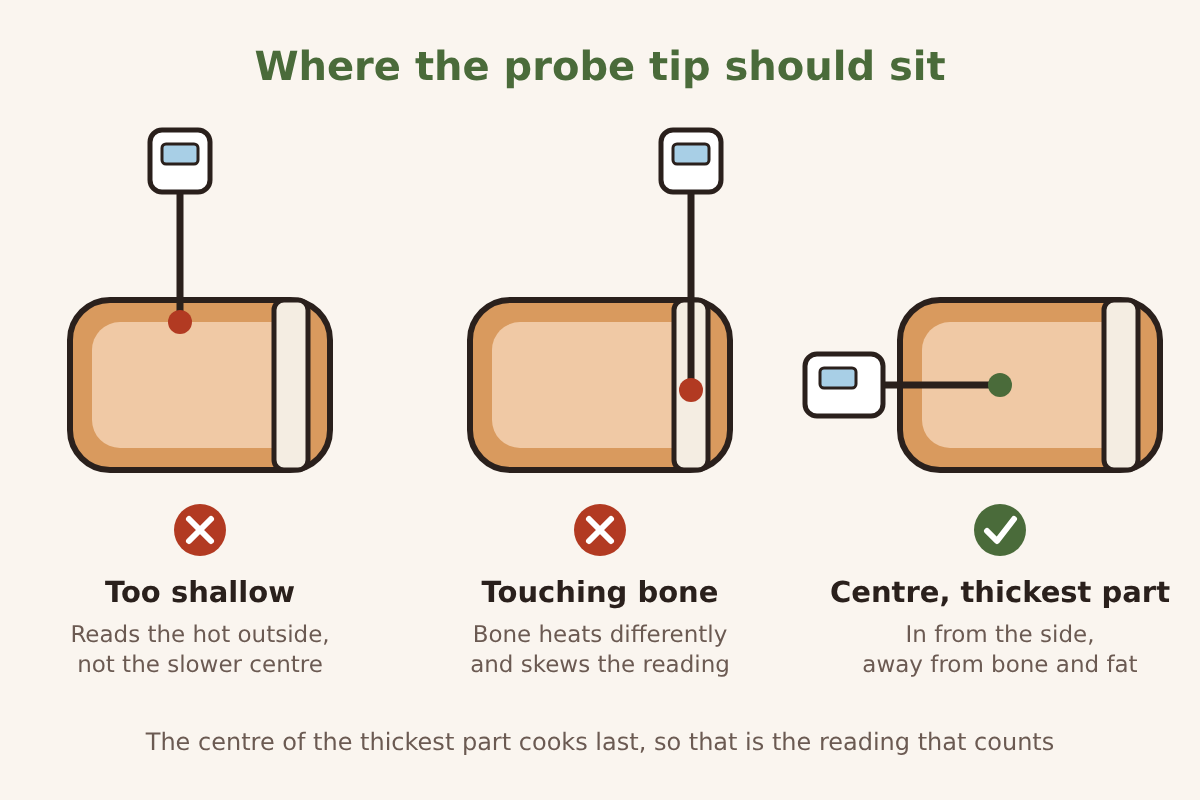
Heat travels from the surface inward, so the centre of the thickest part is always the coolest place in the food while it cooks. That is the spot you want to measure. A few habits make the reading trustworthy:
- Aim for the middle, not just "in". If the tip stops just under the crust, you are reading the hottest layer. If it goes all the way through, you are reading the pan or the air underneath.
- Keep clear of bone, fat and gristle. Bone heats at a different rate from the meat around it, and pockets of fat give a false reading. Back the probe off a little if you feel it hit something hard.
- Go in from the side on thin food. On a ¾-inch (2 cm) chop or a burger, pushing down from the top leaves most of the sensing area in the air. Slide it in horizontally so the tip sits halfway through the thickness.
- Check more than one spot on big or uneven pieces. A roast, a whole bird or a thick piece of fish can be done at one end and short at the other. The lowest reading is the one that counts.
- Start checking early. Take a first reading well before the recipe's time is up, so you catch the food on the way to its target rather than past it.
For whole poultry, USDA says to check the innermost part of the thigh, the innermost part of the wing and the thickest part of the breast; our guide to roasting a turkey until it is done walks through all three spots. A chicken works the same way, which is how the roast chicken with crisp skin gets judged too.
The numbers to look for
These are the USDA safe minimum internal temperatures. Measure them in the spot described above.
| Food | Safe minimum | Then |
|---|---|---|
| Beef, pork, veal and lamb steaks, chops and roasts | 145°F (63°C) | Rest 3 minutes |
| Ground beef, pork, veal and lamb | 160°F (71°C) | |
| All poultry, whole, pieces and ground | 165°F (74°C) | |
| Fish and shellfish | 145°F (63°C) | |
| Egg dishes | 160°F (71°C) | |
| Fresh (raw) ham | 145°F (63°C) | Rest 3 minutes |
| Fully cooked ham, reheated | 140°F (60°C) | |
| Leftovers and casseroles | 165°F (74°C) |
The rest matters for whole cuts of red meat and pork. The temperature keeps rising for a few minutes after the meat leaves the heat, and USDA's 145°F guideline includes that 3-minute rest. Large roasts can climb by several degrees while they rest, which is why some recipes tell you to pull them a little before the final number. When you sear a steak or chop in a hot pan, take the reading right after it comes out, then let it sit.
How to check that your thermometer reads true
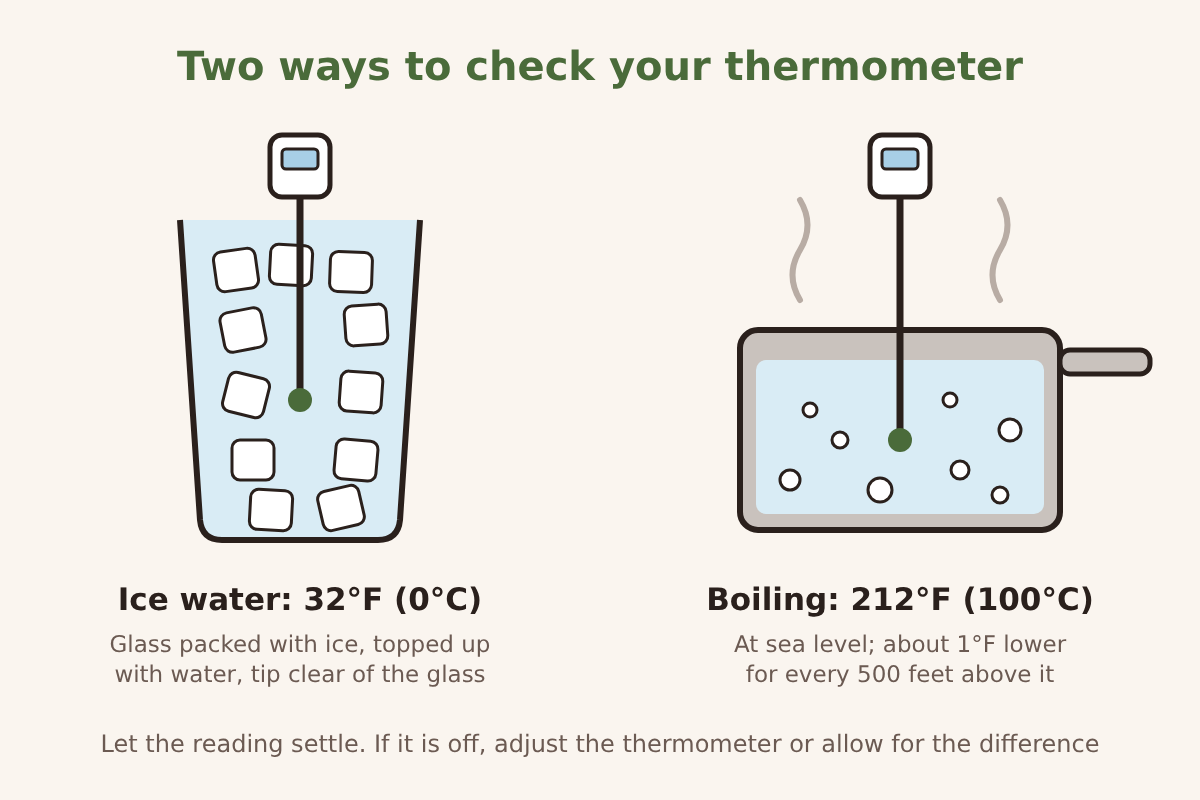
A thermometer that reads a few degrees high will tell you raw chicken is done. Test it before a holiday roast, after it has been dropped, and every so often anyway.
The ice-water test works almost anywhere:
- Fill a tall glass to the top with ice, crushed if you have it, so there are as few gaps as possible.
- Add cold water to just below the rim and stir for a few seconds.
- Put the probe into the middle of the glass, at least 2 inches (5 cm) deep for a dial thermometer, without touching the sides or bottom.
- Wait about 30 seconds, until the number settles. It should read 32°F (0°C).
The boiling-water test is a second check. At sea level water boils at 212°F (100°C), but the boiling point drops as you go higher, by roughly 1°F for every 500 feet (about 150 m) of altitude. If you don't know your elevation, stick with ice water.
If the reading is off, check the maker's instructions. Many dial thermometers have a small nut under the head that you turn with pliers or a wrench while the stem sits in ice water, until the needle points to 32°F. Many digital models have a calibration or reset function. If yours has neither, note the difference and allow for it, or replace it.
Keeping it clean and working
Wash the stem in hot, soapy water after every use, and always between raw and cooked food. A probe that just tested a half-cooked chicken breast will carry its bacteria into whatever it touches next. Most digital thermometers can't go fully under water or in the dishwasher, so wash the stem and wipe the body unless the maker says it is waterproof.
Store it with its sleeve on, if it has one; a bent stem or a cracked probe is not worth trusting. On digital models, a dim display or slow, jumpy readings usually mean the battery is going. Swap it before you need it for a big meal.
